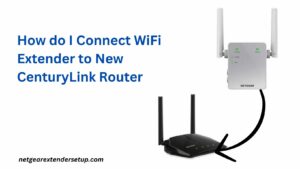
Netgear new extender setup proves to be the optimal solution for enhancing home network performance. While the host router may adequately cover a small home’s WiFi range, larger apartments often experience dead zones, leaving certain areas without internet access. To address this issue, a Netgear WiFi range extender comes to the rescue by extending the existing network throughout the entire house, ensuring a seamless and high-speed internet experience.
For those unfamiliar with the Netgear extender setup process, this blog provides a comprehensive guide. Discover the two most effective methods that Netgear users commonly employ to configure their extenders. Continue reading!
Before delving into the setup procedures, it’s crucial to be equipped with the necessary tools for a successful installation. Ensure you have these essentials to guarantee a smooth process.
Essentials for New Netgear Extender setup
Prepare the following prerequisites before initiating the extender configuration:
1. Stable and uninterrupted power supply.
2. Consistent and dependable internet connectivity.
3. High-quality Ethernet cable.
4. Optimal installation location for the extender with minimal dust exposure.
5. A computer or laptop.
6. Familiarity with the default web address of the extender.
7. Remember the default admin credentials.
These requirements are essential to fulfill before proceeding with the Netgear new extender setup. Now, let’s proceed to the next section, where we delve into the installation methods.
Method 1: Web Browser method for Netgear New Extender setup
Setting up your Netgear New Extender is a breeze with the web browser method. Follow these easy steps to get your extender up and running in no time.
- Power on your Netgear extender and wait for the LED lights to stabilize.
- Connect a Wi-Fi-enabled device to the extender’s default Wi-Fi network.
- Open a web browser and enter the default web address for Netgear extenders (typically mywifiext.net or 192.168.1.250).
- Follow the on-screen instructions to access the setup page.
- The web browser method will guide you through the configuration process.
- Follow the prompts to select your home Wi-Fi network and enter the network password.
- Wait for the extender to connect to your existing Wi-Fi network.
- Once the Netgear New extender setup is complete, reconnect your devices to the extended Wi-Fi network.
- Ensure a stable connection by testing internet access on your connected devices.
Method 2: WPS (Wi-Fi Protected Setup) for Netgear Extender
If your router supports WPS, using this method can simplify the Netgear New Extender setup process.
- Press the WPS button on your router to activate WPS mode.
- Press the WPS button on your Netgear extender within a two-minute timeframe.
- Allow the extender and router to establish a secure connection automatically.
- The LED lights on the extender will indicate a successful connection.
- Verify that your devices can connect to the extended Wi-Fi network.
- Ensure a stable internet connection by testing on your connected devices.
These two methods provide convenient ways to set up your Netgear New Extender quickly and efficiently. Choose the method that best suits your preferences and enjoy extended Wi-Fi coverage throughout your home.
Read More: Netgear EAX15 setup
Perform Netgear EX2700 Setup for Seamless Connectivity
Netgear Extender Installation Using 192.168.1.250
FAQs
Yes, you can use a smartphone or tablet for the setup process.
The default web address is typically mywifiext.net or 192.168.1.250.
The WPS method usually takes up to 2 minutes to establish a secure connection.
Yes, reconnect your devices to the extended Wi-Fi network for uninterrupted internet access.
It’s advisable to choose an optimal location during setup to avoid disruptions.
Ensure proper power supply and troubleshoot any connectivity issues before retrying.
Conclusion
In conclusion, the Netgear New Extender Setup offers a reliable solution for extending and enhancing your home network. By following these two simple methods and meeting the prerequisites, you can bid farewell to dead zones and enjoy seamless internet connectivity across your entire home.